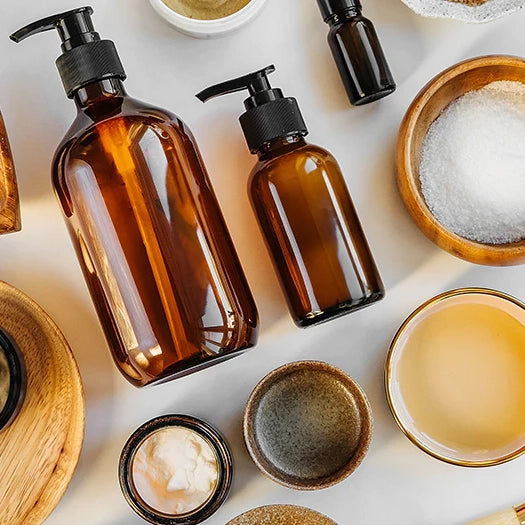


Learn how to make beautifully scented bath bombs at home with this easy step-by-step recipe. Discover what each ingredient does, how to achieve the right consistency and how to troubleshoot common problems for firm, fizzy bath bombs every time.
There's something especially satisfying about dropping a bath bomb into warm water and watching it fizz and swirl around the tub. Making your own is even more rewarding. You can choose your favourite fragrance, keep the ingredient list relatively simple and create a thoughtful handmade gift at the same time.
Bath bombs are also a great introduction to DIY bath and body products. The process is surprisingly straightforward, although getting the moisture level just right can take a little practice. In this guide, we'll explain what each ingredient does, how to recognise the right consistency and how to avoid some of the most common bath bomb-making mistakes.
This recipe makes approximately two medium bath bombs, depending on the size of your moulds.
Jump to recipe
What each ingredient does
Troubleshooting common problems
Optional ways to customise your bath bombs
Packaging and storage
How do bath bombs work?
The satisfying fizz of a bath bomb comes from a simple chemical reaction between sodium bicarbonate (baking soda) and citric acid. While the bath bomb is dry, these ingredients stay relatively inactive. As soon as they hit the water, they react and release carbon dioxide gas, creating all those tiny bubbles and the familiar fizzing effect.
This is why moisture needs to be added very carefully when making bath bombs. Too much liquid, or adding it too quickly, can trigger the reaction in your mixing bowl instead of in the bath.
The other ingredients each play an important role too. Some help hold the bath bomb together, while others add fragrance, colour or a skin-conditioning feel. Polysorbate 80 helps disperse oils and fragrances more evenly through the bath water, rather than allowing them to float on the surface.

Before you begin
Choose a clean, dry workspace away from steam and humidity. Bath bomb ingredients readily absorb moisture from the air, so a very humid day can make the mixture more difficult to work with.
Wash and thoroughly dry your equipment and work surface before beginning. Tie back long hair, wash your hands and wear gloves. Fine powders can become airborne while they are being measured or mixed, so work gently and avoid leaning directly over the bowl. If you are sensitive to dust, consider wearing a suitable mask.
For the most reliable result, weigh every ingredient with digital scales rather than using cups or spoons.
Equipment you will need
- Digital scales
- Large, dry mixing bowl
- Small beaker, jug or cup
- Fine sieve
- Whisk or mixing spoon
- Spray bottle containing witch hazel or isopropyl alcohol
- Bath bomb moulds
- Disposable or reusable gloves
- Tray or sheet of baking paper for drying the finished bath bombs
Bath bomb recipe
This formula makes 200 g, or approximately two medium bath bombs. It is also available as a complete DIY Kit with all of the ingredients you need to make 5 bath bombs.
| Ingredient | Percentage | Weight |
|---|---|---|
| Sodium bicarbonate | 46% | 92 g |
| Citric acid | 22% | 44 g |
| Cornstarch | 8% | 16 g |
| Epsom salts | 10% | 20 g |
| Kaolin clay | 3% | 6 g |
| Sweet almond oil | 5% | 10 g |
| Polysorbate 80 | 5% | 10 g |
| Skin-safe fragrance oil or suitable essential oil | 1% | 2 g |
| Total | 100% | 200 g |
You will also need a small amount of witch hazel or isopropyl alcohol in a fine-mist spray bottle. This is added only as required and is not included in the 200 g formula.
How to make bath bombs
1. Measure the dry ingredients
Place the sodium bicarbonate, citric acid, cornstarch, Epsom salts and kaolin clay into a large mixing bowl. Pass any lumpy powders through a fine sieve, then whisk everything together thoroughly.
Take your time with this step. An even blend helps the bath bombs fizz consistently and reduces the chance of small lumps appearing on the surface.

2. Combine the liquid ingredients
In a separate small beaker or cup, weigh the sweet almond oil, Polysorbate 80 and your chosen fragrance or essential oil. Stir until evenly combined.

3. Add the liquid mixture slowly
Drizzle the liquid ingredients into the dry mixture a little at a time, whisking continuously. Avoid pouring everything into one spot, as this can create wet patches and may start the fizzing reaction.
Once most of the liquid has been incorporated, use gloved hands to rub the mixture between your fingers and break up any remaining lumps.
4. Check the consistency
Squeeze a handful of the mixture firmly. It should hold its shape when released, rather like slightly damp sand.
If it falls apart immediately, spray the mixture once or twice with witch hazel or isopropyl alcohol, mixing thoroughly after every spray. Repeat only if necessary. The aim is to use the smallest possible amount of additional liquid.
If the mixture begins to puff up or fizz in the bowl, it is becoming too wet. Stop spraying and work quickly to fill the moulds.
5. Fill the moulds
Loosely overfill both halves of the mould, leaving the mixture slightly mounded. Bring the two halves together and press firmly. Avoid twisting, as this can cause the bath bomb to split.
The amount of pressure required will depend on the mould, but the mixture needs to be compact enough to hold together without being crushed excessively.

6. Unmould carefully
Gently remove one side of the mould. If it sticks, lightly tap the outside with a spoon. Turn the bath bomb over and carefully remove the other half.
Place the bath bomb on a lined tray or another dry, protected surface. If it feels too soft to remove immediately, leave it in the mould for a little longer before trying again.
7. Allow the bath bombs to harden
Leave the bath bombs in a dry place for 24–48 hours. Drying time will vary with the weather and humidity. They should feel firm before they are wrapped or placed in a container.
What each ingredient does
Sodium bicarbonate
Also known as bicarbonate of soda, this is the alkaline half of the fizzing reaction. It makes up the largest portion of the recipe and helps give the finished bath bomb its bulk.
Citric acid
Citric acid reacts with sodium bicarbonate once the bath bomb enters the water, producing the characteristic bubbles and fizz. Keep it dry and break up any lumps before mixing.
Cornstarch
Cornstarch helps bind the mixture and can slow the reaction slightly, allowing the bath bomb to fizz for longer rather than disappearing immediately.
Epsom salts
Epsom salts are traditionally added to bath products and give the formula a spa-like feel. Use a fine grade where possible, as large crystals can make the bath bombs more difficult to compact smoothly.
Kaolin clay
Kaolin clay adds structure and helps produce a firm bath bomb. It also contributes to a smooth, velvety feel in the bath water.
Sweet almond oil
Sweet almond oil adds a light emollient quality and helps bind the dry mixture. If the bath bombs are being made for someone with a known nut allergy, choose an appropriate nut-free oil and test the adjusted recipe before gifting it.
Polysorbate 80
Polysorbate 80 is a dispersing ingredient that helps the sweet almond oil and fragrance mix through the water. It can also reduce the amount of oil or colour left clinging to the sides of the bath. The bath may still become slippery, however, so care should always be taken when getting in and out.
Fragrance or essential oil
This gives the bath bombs their scent. Choose a fragrance specifically approved for bath and body products, or an essential oil suitable for use in a rinse-off bath product. Check the supplier’s recommended usage rate and relevant IFRA guidance, as maximum levels vary between fragrances. Not every essential oil is suitable for bath products, children, pregnancy or people with particular health conditions.
Troubleshooting common bath bomb problems
The mixture is too dry and crumbly
Before adding more liquid, squeeze a handful of the mixture firmly in your hand. If it still won't hold its shape, add a single fine spray of witch hazel or isopropyl alcohol, mix well and test again. It's easy to add too much moisture, so work slowly and avoid adding several sprays at once.
The mixture is fizzing or expanding
This is usually a sign that too much moisture has been added or the mixture has absorbed humidity from the air. Stop adding liquid and press the mixture into the moulds as soon as possible. For your next batch, use fewer sprays and make sure all bowls, utensils and work surfaces are completely dry.
The bath bombs crack after unmoulding
Cracks often mean the mixture was slightly too dry, wasn't packed firmly enough or was removed from the mould before it had fully set. Adding a tiny amount of extra moisture may help prevent cracking in future batches.
The bath bombs stick to the mould
If your bath bombs are difficult to remove, the mixture may be a little too wet or packed too tightly into the mould. Try gently tapping the mould instead of pulling the bath bomb out. Depending on the mould and the weather, letting it sit for a few extra minutes before unmoulding can also help.
The bath bombs develop bumps or a rough surface
Small bumps, often called "warts" by bath bomb makers, usually indicate that the ingredients have started reacting too early. Excess moisture, high humidity or adding wet ingredients too quickly are the most common causes.
The bath bomb sinks instead of floats
Don't worry if your bath bomb sinks to the bottom of the tub. Floating isn't a sign of quality. Whether a bath bomb floats or sinks depends on factors such as its density, shape and how firmly it was packed. As long as it fizzes properly and disperses in the water, it's working as intended.

Optional ways to customise your bath bombs
Once you're comfortable with the basic recipe, it's fun to experiment with different colours, fragrances and decorative touches. Just keep any changes fairly modest, as adding extra liquids, oils or powders can affect how well the bath bombs hold together.
- Colour: Use a colourant designed for bath products and follow the supplier's instructions. A little usually goes a long way, and using too much may leave residue in the bath or stain surfaces.
- Fragrance: Choose a skin-safe fragrance that suits the occasion. Lavender is a popular choice for a relaxing bath, while citrus blends can feel fresh and uplifting. Seasonal fragrances can also make lovely gifts.
- Botanicals: A small sprinkle of dried petals can look beautiful, but loose plant material can be messy to clean up afterwards and may contribute to blocked drains. For that reason, it's best to use them sparingly.
- Decorative finish: A light dusting of bath-safe mica can add a subtle shimmer or decorative finish. Make sure it's suitable for bath products and use it according to the supplier's instructions.
How to use a bath bomb
Fill your bath with warm water, then drop in a bath bomb and enjoy the fizzing display as it dissolves. Allow it to disperse naturally through the water rather than holding a concentrated, wet bath bomb directly against your skin.
Take care when getting in and out of the bath, as oils can make surfaces slippery. After your bath, give the tub a quick rinse to remove any remaining oils, colourants or botanicals. If irritation occurs, discontinue use.
Bath bombs are for external use only. Keep them out of reach of children and pets, and store them somewhere they won't be mistaken for food.

Packaging and storage
Humidity is the biggest enemy of a finished bath bomb. Once your bath bombs are completely dry and hardened, wrap them individually or store them in an airtight container. Keep them in a cool, dry place away from direct sunlight and the steam and moisture of the bathroom.
If you're giving them as gifts, package them in a small box with tissue paper or a reusable jar for a thoughtful finishing touch. Include a label with the ingredients and basic directions for use. It's also a good idea to note the date they were made and highlight any ingredients that could cause allergic reactions.
For the best fizz and fragrance, try to use bath bombs within three to six months. They may still be usable after that if stored well, but exposure to moisture in the air can gradually reduce both their scent and fizzing performance.
A simple handmade gift
Homemade bath bombs are easy to personalise and can transform an ordinary bath into a relaxing self-care ritual. A pair of bath bombs wrapped neatly with a handwritten label makes a thoughtful gift on its own, or they can be combined with bath salts, a body scrub or another handmade product to create a complete spa hamper.
Your first batch may not look perfectly smooth or uniform, and that's completely normal. In fact, it's part of the charm of making bath bombs by hand. Once you've learned to recognise the right texture and understand how little moisture is needed, the process becomes much easier, leaving plenty of room to experiment with colours, fragrances and your own creative touches.
This recipe is provided for personal, home use. Always check supplier documentation for individual ingredients and fragrance limits, patch test where appropriate, and clearly label products made for gifting.