They are perfect for those starting out on their DIY skincare making journey.
Jump to the Recipe
Body Butter Ingredients
Procedure
Dealing with Greasiness
Preventing Graininess
Customising and Troubleshooting
What is body butter?
Body butters are generally thick mixtures of oils, butters, and, sometimes, waxes that protect your skin from drying. As the end result can be quite thick, they are often whipped to create a lighter texture, making them easier to apply.
Body butters vs. lotions
Personally, I’m more of a fan of lotions for a lighter skin feel and absorption, but there are definitely times when body butter can be the best choice.
The advantages of body butter over a lotion
-
Simple ingredients: For those who enjoy making their own skincare products, body butters are popular because of their simplicity.
They can be made with few ingredients and don’t need a preservative or an emulsifier. That makes them perfect for those starting out on their DIY skincare journey. - Protective barrier: Because body butters are denser than lotions, they are also more occlusive, meaning they can create a barrier that helps keep moisture from leaving your skin. For the same reason, they have better staying-power on your skin than a lotion.
- Long shelf life: Because they lack water, they aren’t as prone to microbial growth, so they have a longer shelf life.
The disadvantages of using a body butter
- More expensive: Unlike lotions that are composed mainly of water, most body butters are completely made from active ingredients like oils and butters. That definitely makes them more expensive to make.
- Greasiness: Due to the general density of body butters they can feel greasy to some people. However there are ways to help reduce that greasy feeling and improve the texture of a body butter (see below).
- Not as hydrating: Because they don’t include water, body butters don’t incorporate moisture deep into the skin. It can help to apply your body butter over wet skin or even over a lotion.
When it's best to use a body butter
Body butters provide a great barrier to help prevent moisture from escaping your skin. That makes them an ideal skincare product for people living in dry climates.
Those who have very dry skin, or dry skin patches like rough elbows or heels, will probably also prefer the heavier, creamier feel of a body butter for those rough, dry areas. You could also consider applying to dry rough feet.
While you could use a body butter on your face, most people find it too heavy. Body butters also have a tendency to leave your skin looking oily or greasy.
Body Butter Ingredients
A simple whipped body butter can be made with just a few ingredients that you may already have at home. I like to use a combination of a hard butter, a medium-weight butter, and a soft butter or liquid oil. Using a variety of fats allows you to incorporate the beneficial properties of each one.
Mango or shea butter?
Mango butter is derived from the seed of the mango fruit and is a medium-weight butter that has a nice feel when applied to the skin. It’s rich in vitamin A and E, both antioxidants that protect against free radical damage. Vitamin A promotes cell turnover while vitamin E protects cells from oxidative stress. Both vitamins promote healthy skin.

Shea butter is another great medium-weight body butter that’s been extracted from the nut of the karite tree. Like mango butter, it contains high levels of vitamin A and E, along with other nutrients such as zinc and iron. It’s easy to find and it whips up really well.
Unrefined shea butter has a strong scent that many people find unpleasant or overwhelming. Choose unrefined if you are bothered by the scent of shea.
Cocoa butter
Cocoa butter comes from cocoa beans. It’s a hard butter that is rich in fatty acids and polyphenols, making it very emollient and protective for your skin. It helps keep your skin soft and supple while improving skin elasticity and reducing wrinkles.
Not only is it a harder butter than shea or mango, but it also has a higher melting point. That makes it a good addition for those who live in warmer climates.
Like unrefined shea butter, unrefined cocoa butter has a relatively strong scent that some people find overwhelming. Others love it because it smells like chocolate! If you are concerned, choose refined cocoa butter instead.
Cocoa butter can be substituted with either kokum butter or tucuma butter.

Sweet almond oil
Adding a liquid oil to the body butter helps balance out the hard butter, softening the finished product. You can choose any liquid oil that you happen to have on hand, including coconut oil.
Sweet almond oil is obtained from pressed almonds. It’s a light oil that is naturally anti-inflammatory and feels wonderful on the skin. It’s also rich in essential fatty acids including linoleic acid and oleic acid. These two fats help maintain moisture balance within our bodies and prevent dry skin.
To reduce the greasy feeling of your body butter, try incorporating one of the so-called “dry oils”. Dry oils are oils like grapeseed oil, or rosehip oil that are more rapidly absorbed into the skin.
Other ingredients
Vitamin E, an antioxidant that will help extend the shelf life of your body butter. It’s also nice to add some arrowroot powder to help reduce any greasy feeling. Essential oils can also be added for fragrance.
Please be mindful when choosing essential oils as some can cause photosensitivity, meaning they can make the skin more sensitive to sunlight or ultraviolet (UV) radiation. This increased sensitivity can lead to a greater risk of sunburn, skin irritation, or discoloration when the skin is exposed to sunlight or UV rays after applying or using the essential oil. Ones to think about include:
- Bergamot
- Lemon
- Lime
- Bitter orange
- Grapefruit
- Apart from the citrus oils, some other oils, like petitgrain, marigold, lemongrass, and verbena, among others, may also cause photosensitivity.
Procedure
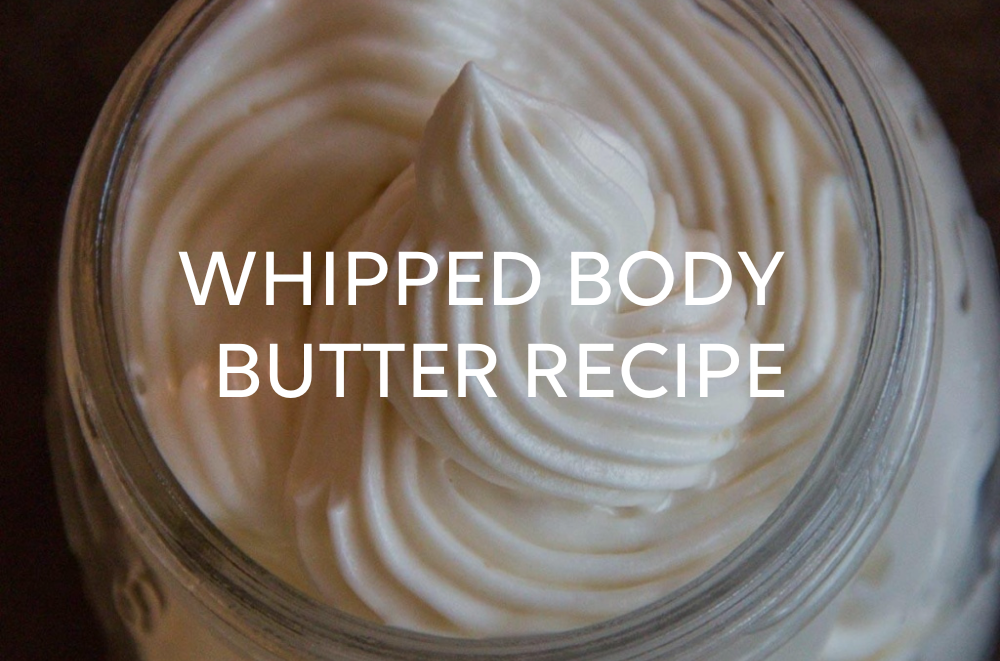
While making a body butter can be as simple as melting all of the butters and oils together and pouring them into a storage container, by whipping the mixture as it cools, you incorporate air, resulting in a lighter, fluffier product that’s easier to apply. Whipped body butters glide on much easier and have a lighter feel.
The key steps are melting the ingredients together, allowing them to partially solidify, then vigorously whipping to incorporate air to create a light, fluffy texture. Proper cooling and whipping are essential for achieving the whipped consistency.
There are several ways to make whipped body butter.
First, the cocoa butter needs to be melted so that it can be combined with the other ingredients. Some people prefer to heat and melt all of the ingredients together. Others prefer melting the cocoa butter with the liquid oil and later incorporating the shea or mango butter during the whipping process.
Either way, gently melt the cocoa butter (or other hard butter) with the liquid oil(s), preferably in a double boiler. The mango or shea butter can be melted with the other fats or added during the whipping process.

Preventing graininess
Shea butter and mango butter can become grainy when heated above their melting temperature and allowed to cool slowly. To avoid this problem, either add them after the rest of the ingredients have mostly cooled or melt them with the other ingredients and then rapidly cool the mixture in the fridge or over an ice bath.
Whipping the body butter
Once cooled, you can add in heat-sensitive ingredients like vitamin E and essential oils. You can also add some arrowroot starch (or another starch) to help reduce greasiness.
Whip the mixture with an electric beater to combine the ingredients well and begin to incorporate air.
Once you have a nice fluffy consistency you can spoon or pipe your finished whipped body butter into a container.

Customising and troubleshooting
There are many reasons that you may need to adjust the recipe slightly. It may be due to the climate you live in or just a matter of preference.
How to make it feel less greasy
Many people, especially those with oily skin or those who are used to using light lotions, feel that body butter is too greasy.
To make a whipped body butter feel less greasy on the skin, you can try the following tips:
- Use lighter, drier oils like grapeseed, jojoba, or sunflower oil. Lighter oils absorb more readily into the skin without leaving a greasy residue.
- Add a small amount of cornstarch, arrowroot powder, or tapioca starch. They will help absorb excess oil and create a silkier, less greasy texture.
- Whip the body butter thoroughly and for an extended period to incorporate more air. The more air whipped in, the lighter and fluffier the texture becomes, reducing any greasy feel.
- Consider using less butter/oil overall in the recipe or increase the ratio of butters (like shea or cocoa) to oils. Butters tend to feel drier and less greasy than oils on the skin.
What to do if it’s grainy?
If mango or shea butter cool too slowly your body butter could become grainy or gritty. Should that happen there’s a couple of things you can do to rectify the situation.
First of all, try remelting your body butter. Once fully melted make sure to cool it down quickly by placing the container in the fridge or freezer until it’s almost solidified but still has a light indent when pressed. This rapid cooling prevents the fatty acids from separating and forming grainy crystals.
Remove the partially solidified body butter and place it in an ice bath. Begin whipping it vigorously with a hand mixer or whisk until it is fully cooled and light and fluffy in texture. The whipping incorporates air and prevents graininess.
If the body butter remains grainy after whipping, you can repeat the melting and rapid cooling process until you achieve the desired smooth texture.
You can also try adding a small amount of cornstarch, arrowroot powder, or clay to help absorb excess oils and create a silkier feel if the body butter still feels greasy after fixing the graininess.
How to soften it if it’s too hard (or harden it if it’s too soft)?
It’s impossible to share a recipe that everybody will like as we all have varying preferences in how soft or hard the final product should be. Plus, unlike lotions, this product will be softer when stored in warmer environments (and harder when stored in cooler environments), which makes it important to know how to adjust the recipe as needed.
To get the perfect texture, adjust the ratio of hard butters (like cocoa butter), medium-weight butters (like shea butter or mango butter), and liquid oil(s).
For a softer butter, increase the amount of liquid oil and/or add less cocoa butter. For a harder one, decrease the amount of liquid oil and/or add more cocoa butter.
If you leave your whipped body butter in a hot area, it may melt and re-solidify into a flat, dense cream, losing the air that you incorporated during the whipping process (and potentially becoming grainy). Adding too much cocoa butter, though, results in a hard, waxy body butter that is difficult to apply.
The medium-weight butters help soften the mixture, but also have relatively low melting points. They don’t provide the same barrier to moisture loss as cocoa butter either.
Adding liquid oils will help soften the mixture and make it glide better. Too much oil, though, results in a product that won’t solidify enough to make a stable whipped butter.
Adjusting once finished
Luckily, if you aren’t happy with your mixture, it’s pretty easy to fix. If it’s only slightly on the hard side, you may be able to whip in some more liquid oil without re-melting your ingredients. On the other hand, if you need to harden it, you may be able to whip in some melted cocoa butter in the same way.
If you aren’t able to whip your body butter with the new ingredients as-is, you can remelt it and make your changes as needed. Then, go through the cooling and whipping process again until you get it the way you like it.
If you do remelt it, keep in mind that Vitamin E and some essential oils are more delicate and heat sensitive. Try to re-melt your butter gently over a double boiler to keep them as intact as possible.
If you feel that your butter has lost its scent during the remelting process, try adding a few extra drops of your chosen essential oil without going overboard. Essential oils can cause sensitivity when used in large quantities. (That’s especially important with some of the more allergenic oils or those that are more prone to cause irritation to the skin). It’s best to keep the total amount to less than 2% of the recipe by weight.
How long will your whipped body butter keep?
Because whipped body butter is an oil-based product and doesn’t include any water, it isn’t prone to microbial growth. That means that unless you contaminate it with water (by scooping it up with wet hands and/or storing it uncovered in a humid environment), you shouldn’t have to worry about bacteria or mould. If you are careful when using your whipped body butter, there is no need to add a preservative.
The shelf life of your finished product is dependent on the shelf life of the various ingredients used.
To determine the “best used by” date, check the expiration dates on the packaging of your chosen butters and oils. Your butter will have a shelf life similar to that of the oil or butter used with the shortest shelf life.
To help slightly extend the shelf-life of your butter, you can add an antioxidant like Vitamin E oil.
The shelf life of a whipped body butter typically ranges from 6 months to 1 year, depending on the ingredients used and proper storage conditions.
For whipped body butters containing shea butter as the main ingredient:
- Unrefined shea butter has a shelf life of around 12 months. When whipped into a body butter, its shelf life is reduced to around 6-9 months.
- Refined shea butter can last up to 2 years, so a whipped body butter made with refined shea may keep for 9-12 months.
For body butters made with other butters and oils like cocoa butter, coconut oil, etc.:
- The shelf life is generally around 6-12 months, depending on the specific oils/butters used and their individual shelf lives.
To maximise the shelf life of whipped body butters:
Store them in airtight containers in a cool, dark place away from heat and moisture. Refrigeration can further extend shelf life.
Always remember to use clean utensils when scooping out your whipped body butter to avoid introducing bacteria. Also, be sure to check for signs of spoilage like rancid odours, change in colour/texture before using after the expected shelf life.

Basic Whipped Body Butter
Smooth and creamy, a homemade whipped body butter should glide on easily and soothe dry, rough skin.
Prep Time
15 minutes
Cooling/whipping time
30 minutes
Total Time
45 minutes
Batch Size
100g
Ingredients
- 50 g mango butter (or shea butter)
- 20 g cocoa butter (or kokum butter)
- 26 g sweet almond oil (or another liquid oil)
- 2 g arrowroot starch (optional, to reduce greasiness)
- 1 g vitamin E
- 1 g essential oils (Optional, for fragrance)
Instructions
- Weigh out the cocoa butter and almond oil in a double boiler or double boiler insert.
- Heat over medium heat until the cocoa butter has melted. Then, remove from the heat source.
- When the mixture has mostly cooled, add the mango or shea butter, the arrowroot starch, the vitamin E, and the essential oils. Whip until fluffy.
- If it's too soft to hold its shape yet, place in the fridge or over an ice bath to quickly cool it. (Rapid cooling of melted mango or shea butters is important to prevent graininess.)
- Remove from the cold source and whip one last time.
Storage
- Spoon or pipe the finished body butter into a storage container. Store out of the heat so that it doesn't melt.
Choosing essential oils
Different essential oils can give a different fragrance and feel to your finished body butter. Lavender, for example, has more of a calming effect while citrus oils can be more invigorating.
Keep in mind that many citrus oils (especially pressed oils) can cause photosensitivity, meaning that you may be more prone to burning if you wear them out in the sun. Avoid phototoxic oils if you plan on wearing your body butter outside during the day. (Most distilled oils are OK to use, but even distilled grapefruit oil may cause some photosensitivity.)


